Given the time constraints I've had trying to get this tutorial moving, I’ve decided to shake things up a bit to get the posting a bit more regular.
So I've dropped the 3D man part of this tutorial to focus on the slightly more complex Plane model. The trick with this is to master the 3 main commands (the bread and butter of 3D modelling), namely Move, Scale and Rotate. by the end of this tutorial you should be used to flipping between them and how best to use them to get results.
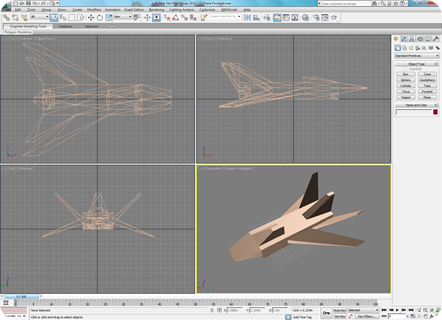
This is what were aiming for:
 |
| End result of 3D plane |
Now this isn’t intended to be pretty, later on we will come back to this model for texturing and animation (amongst other things)
So let us begin.
First with some basic controls for Max (will do the same for Blender), practice with these until you’re happy getting around.
Selecting a viewport
Now for the first basic step, you got the application loaded, you’re running around with your mouse and wondering where to click next. Remember the descriptions about the view ports in Tutorial 1 (I know it’s been a while so you might need to do a quick refresh).
Well mouse command with 3D software works a little differently, first it’s the right mouse button that is king, it is used for selecting viewports and more importantly cancelling commands while you are performing them.
Left mouse button is used for drawing and selecting commands. You can also combine this with the CTRL (Control) key to select multiple items.
Middle mouse button is used moving the view around left / right and up / down. You can also combine this with the ALT key to rotate view around.
Crack the Mould
You got to start somewhere right?, so we begin with a basic primitive, a box, which in 3DS max we can shape it the way we want it straight away.
- So first right click in the “Top” viewport and then go to the command bar in the right hand panel and select “box”
 |  |
- Then draw a rectangle in the “Top” viewport by clicking and dragging from top left to bottom right using the left button of the mouse.
| Feel free to play with the rest of the standard primitives in the command panel if you wish. |
Now, when you let go of the mouse, you have to remember you haven’t finished drawing, a box like most primitives in max, allows you to draw many dimensions when creating objects.
- Now drag your mouse upwards, you should notice your shape now gains height (as above) in the other windows. Click the left button mouse when your happy with the height to finish.
- Next we want to carve up the box ready for us to build our plane.
 |  |
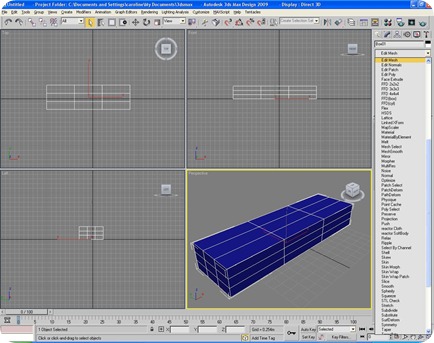
Here we set the initial properties for the box we have just created such as the height, width, length, how many segments in each dimension. You also have the open when creating a box to restrict it to a simple cube, meaning that all dimensions will remain equal when drawing the box.
- Copy the settings from the screen above for your box, the L / W / H don’t have to be exact (just get close enough) but set each of the segments to 3. this breaks the box up in to 27 individual cubes and gives us a start point to begin pulling it apart.
| *Tip – Hitting F4 will toggle between showing the geometry of objects in the viewports. To display a solid or shaded wireframe view. |
Practice getting the hang of views
Before we jump a little further you should familiarise yourself with moving around the views now that you have something to look at.
following on from the section earlier, select a view (say perspective) with a right mouse click and hold down the middle button of your mouse, note that now when you move the mouse, the view moves on the X and Y axis (up, down, left and right).
Now hold down the ALT key and repeat the process, you should now notice that the view rotates around the model now.
Also if you use the scroll wheel, the view zooms in and out.
These movements work in all of the viewports, play around and get used to them as you will be using them a lot.
Importance of model types
Now for us to continue, we need to convert the box we have created in to something we can mould. When you create objects from the command bar, they each have a set of parameters (like the box above) with which you can tweak to change their basic shape:
- Boxes have Height, width and length (plus segments)
- Spheres have a radius and segments
- etc.
Now this is fine when you are just creating basic objects but to start to work on them in a more creative way, you need to convert them in to an editable object, either a mesh or a polygon.
Now I wont go in to the intricacies of the difference between an “Editable Mesh” and an “Editable Polygon”, as there is not much between then but they each have their own unique properties and way you work with the converted object (there are a few other types as well). I shall leave you to play with each type in your own time.
Key thing to remember when converting an object in to an editable object option is that it’s previous parameters are lost when using the right click option, you no longer retain to tweak the object from it’s original form. So check that you are happy with it before you convert it. Using the second method does not.
Selection modes on an object
Next hurdle to get across is to show the different ways you can select the object. if you have been playing so far you will see that when you click on your object that you are selecting the entire object in one. Now, to get modelling we need to work on a much lower level.
Most 3D tools once you start pulling the objects apart give you the following selection options:
- Vertex – lets you move the individual points of the object
- Edge – moves the selected edges :-) (2 vertexes and 1 line per edge)
- Face – moves a face of a polygon (4 vertexes and 4 lines per face)
- Polygon – moves an entire polygon (8 vertexes and 12 lines)
- Element – lets you edit the properties of each part of the object
In 3DS max this is represented in the right hand command panel from the second tab, as shown below
| Second tab selected with the parts of the edit tree expanded. By default it is displayed collapsed with a cross to the left of the “Edit Mesh” or “Edit Poly” modifier in the list |
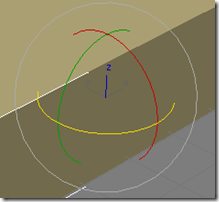
How to use the GIZMO
the Gizmo is an important tool no matter what 3D application you use, they all work pretty much the same way.
So here’s the Gizmo in it’s three variants in Max, each looks a little different and operates differently to support the kind of action/command you’re performing
Lastly, a note on Pivot Points
A key thing to remember about the Gizmo is that it operates from a single point, known as the Pivot point. By default this point is the bottom centre of the object or the middle of an individual element (such as an edge or polygon).
you can change this which we will go into in a later tutorial, but something to be aware of. So if something doesn’t rotate or Scale how you like, then it will be because of the Pivot point
In Conclusion
This action packed intro to tutorial is essential as you go through the main section (coming very soon). SO practice the above and play at moving around the viewports, using the basic commands and looking at the make up of objects.


No comments:
Post a Comment