Friday, 3 July 2009

A bit quiet, but here’s more

Sorry to say but work has taken priority at the moment and drained most of my resources (I’m getting battered to hell with deadlines approaching)

Fear not though as I am still working on the tutorial (I set a goal and I'm keeping to it, just not in a timescale I might of liked) although after 1 sick week I did manage to revamp a little XNA work updating an old Camera Examples project that shows how cameras work and how to manipulate them.  It’s been updated to XNA 3.1 and had some fluff added around the edges, a monster input manager and customisable control system, I also integrated the networked GSM sample from the creators site with some additions from my colleague Charles from Dark Omen Games.  Not quiet finished yet as I want to write the settings configuration pages a bit better before re-releasing it.  The Existing XNA 3 project can still be found here on Box.Net (link to follow, thank you firewall) or on my Codeplex page (if your curious about it)

Anyway, that’s not why I was phoning.

As a 3D modelling blog, i have to mention a guy of great interest who has set a very daunting challenge.

100 models in 100 days

Now that is a lofty goal but one that “Josh Mooney” is really up for and is progressing very well with, so far he has gone through about 4 categories:

  • RPG style set
  • A few spaceship models (although he admits these are not up to much)
  • An Entire 3D chess set (which is absolutely fantastic)
  • A 3D RTS set

Work continues and you can follow his progress here.  Keep up the fantastic work Josh.


The Chess set in it’s finished presentation

Wednesday, 10 June 2009

Support Ziggyware

I’m currently a bit out of action at the mo which is hampering my efforts to get the next tutorial up but I’m doing what I can to finalise it. I’m desperate to get past the initial mud of this course and get on to the fun stuff, but softly softly.

It seems even my good friend Charles from Dark Omen games has been plundering on without my help now and created some interesting Blender results with his own hands and imagination, check it out here on his blog, there is another video on the same concept which just freaks me out.

Anyway, back to the main thread.

Ziggyware.com is one of the best sites for XNA resources and has been around since the beginning. It including Articles, Tutorials, News and even an Image of The Day section where you can look at what other people are doing.

But that’s not all. One of the things that sets Ziggyware apart from others is that about two or three times each year, it holds a “XNA Articles Competition”. The result of this competition usually takes form in lots of top-quality tutorials and articles about stuff you can do with XNA. Ziggyware wants to repay the talented people that make these tutorials, so he gives them prizes. Because of this, from time to time, there’s a call for donations, and now is such a time.

If you like to use the articles on Ziggyware, and if you want to help the site grow, prosper and continue to provide a constant stream of good XNA articles, you now have the chance to do so, by going on Ziggy’s site, and seeing how you can help.

ziggyware[1]

Thursday, 4 June 2009

Nebulon In Play Test

Not quiet part of the 3D tutorial, but I got a shout it here.

boxart

So,as I have mentioned before, I am part of a group called Dark Omen Games, and we have finally got around to getting a Creators Club Premium membership so we can start to release our games on the Xbox Live Creators Games.

As my post title suggests, the first game we are putting up is Nebulon, the brain child of Dave Bonner.

Nebulon is a 2D top down shooter, you fly your ship around looking for alien “photons” to warp in so you can shoot them. You have to be quick though, they like to gang up and if to many get together there is the chance of a wormhole opening up and something nasty coming out..

Here are a few screen shots:

Nebulon 2009-06-02 22-34-26-59 Nebulon 2009-06-02 22-31-16-64 Nebulon 2009-06-02 22-32-36-56 Nebulon 2009-06-02 22-32-56-59 Nebulon 2009-06-02 22-33-21-60 Nebulon 2009-06-02 22-33-56-59

As you can see it can get pretty funky.

Here is a clip (pre play test drop):


If you have a Creators Club Premium account, please get on a give it a play test, we really would love to hear your feed back on it so we have a solid, robust game going into peer review.

You can leave your comments here, on the play test forum for Nebulon or on our blog.

So get your trigger fingers at the ready and start blasting some photons!

Monday, 18 May 2009

3D Modelling Tutorial Part 2 – 3DS Max

Following on from the basics in the previous post (which I had to split.  It was making this tutorial too large) we continue on to shape our box in to an airplane.

As a reminder and in case your scroll button is broken, along with page down and the down arrow buttons, I know mine usually feel like that sometimes after a pretty long document.  Usually from me hitting it with something hard, like my head. 

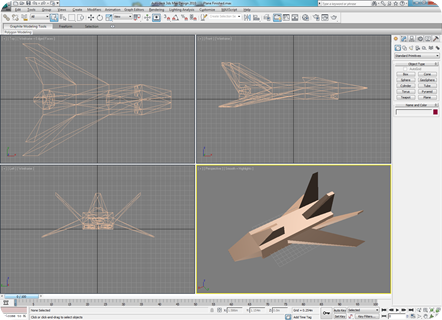
Here’s the objective in this tutorial.

 Tut2-Plane Finished

End result


Making the Wings

First off the Winds.  To make the wings of the airplane we are going to extrude the middle portions of the box, flatten them down and shift them back.

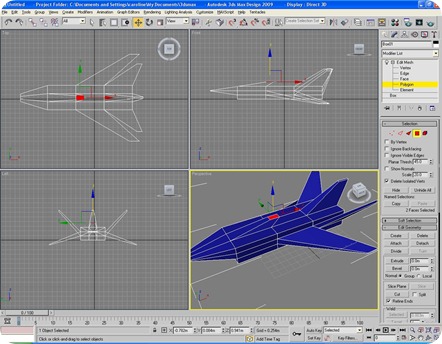
Now to work at the polygon level we need to change our selection criteria from object to polygon.  If you remember from the earlier post, we do this from the right hand command panel on the second tab.

image

  • With the object selected, click on the second tab in the command bar window.
  • Expand the “Edit Mesh” tree
  • Select the “Polygon” branch of the tree and you are in polygon selection mode

If the “Edit Mesh” branch is not there, then either you have not converted the object to a “Editable Mesh” or selected a different conversion option.  Read back to see if you have overlooked something

  • Next we select the polygons we are going to use for the wings, so select the box (our object) in the perspective view, go to the right hand command panel and select the second tab (modifier tab)
  • Expand the tree for the “Edit Mesh” item in the list and select polygon.
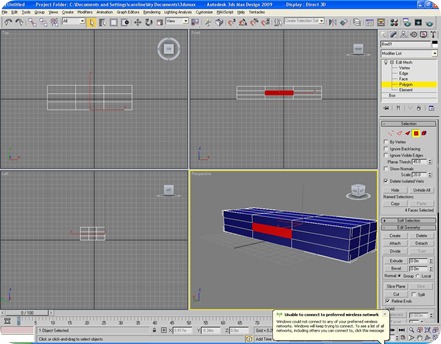
  • Now click on the square in the middle of the side of the box (as shown below), the polygon should change to RED to identify is has been selected.
6-Select Poly

Side middle polygon selected in perspective view.  Note side or front view could also have been used.

  • Now in the perspective view, hold down the ALT key, press the middle mouse button and rotate the view around so you can see the opposite side of the box
  • Release the mouse and ALT key’s
  • Now hold down the CTRL (Control) key and select using the left mouse button the same polygon on the side now in view (as shown below).  you should now have the same polygon selected on both sides of the box (rotate the view around to see both sides to be sure). 
Don’t use the right mouse click or select a polygon without using the CTRL key or you will deselect what were aiming for.


7-Select poly 2

Polygon also selected on other side of box.  Side or front view would not help selecting the back side.

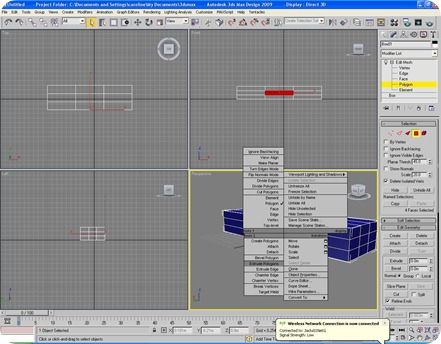
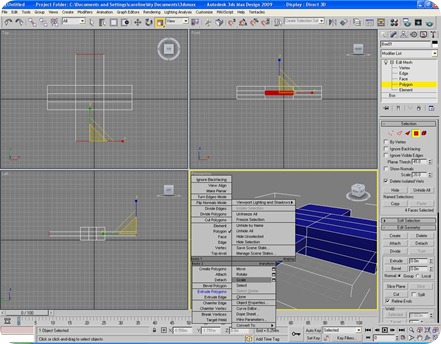
  • Now right click on the selected polygon in view and select the Extrude command.  you will notice the mouse icon will change to a stacked box icon when hovering over your selection now.

8-Extrude

Right click menu, note “extrude” command on right hand side of panel

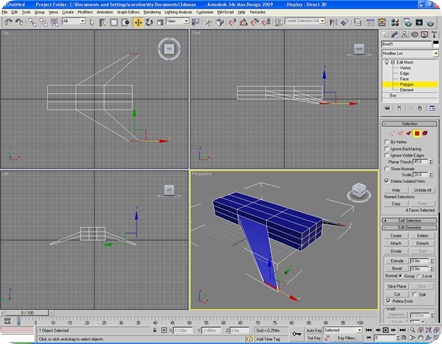
  • To Extrude, hover mouse over selected area, hold the left button of the mouse and pull down.  you should get an effect the same as the picture below.  Extrude it until the wings are about the same width as the length of the plane.
*Note – Try also pulling back with the mouse when Extruding just to see the effect.  The polygons move inside the box instead of outwards.  Right click at any time while performing a command to undo any changes.


9-Post Extrude

After Extruding the wings

  • Now with the wing polygons still selected we need to switch to the Scale Command.  Like before right click in the selected area and select “Scale” from the right click menu.  The SCALE gizmo should appear on the selected area
10-Scale

Select the “scale” command

  • As before, hover the mouse of the selected area (note the icon has changed again, but only over the selected area).  Click on the Blue “Z” arrow of the GIZMO and this time pull down to scale in until the edges of the end of the wing meet up
  • Also then select the “X” arrow and narrow the wing tip slightly.  You are aiming for an effect as shown below.
11-Post Scale

Wing tips after scaling

  • Lastly, still continuing with the wing tips selected, were going to move them to the back of the plane and down a bit.  For this we need to change to the Move command.  Again like before right click on the selection and click on the “Scale” command.
12-Move

Select the “move” command

  • Now if you grab the centre of the Move gizmo where both boxes highlight yellow and drag the wings back and down in the perspective view until they are just past the rear of the plane and dipping just below the bottom (as shown below).  Alternatively use the top and side views and do it in two stages (back then down).
I usually prefer the perspective view doing this kind of manoeuvre as it gives you the fluidity to see how your model shapes as you move.


13-Post Move

Wings in final position

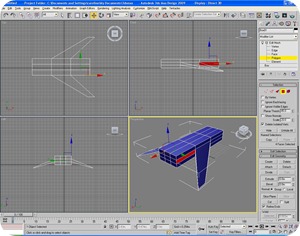
  • With the wings done, it’s time to get on with the tail.  now this involves exactly the same operation as the wings but angling up instead of down. so:


14-Tail Wings Before Select the polygon in the middle rear of the plane and the same on the other side as with the wings


Extrude the tail wings out and then scale down to a point like with the wings.
Finally move then back and up this time until they are at the opposite angle of the wings
15-Tail Wings After
  • Then it’s on to the tail itself, again this is a similar approach
16-Tail Before We start off by selecting the centre polygon at the rear of the plane


Again like before, Extrude up, scale the top in, this time only moving the tail backwards so it the top is just overshooting the rear. 17-Tail After 
If you want to get more interesting, try having a split tail by using the two polygon’s to either side of the centre one instead of the centre.  Or even all three.  Experiment and see where it leads.


On to the Cockpit and nose

You will seem to notice a trend here in the way that the original body has been pulled and stretched to make the wings.  Now the nose may seem more of the same but you can always add simple variations.  These actions are the bread and butter of meddling so best to practice with them.  Anyway on with the show.

So far we have only been manipulating single polygons at a time, granted we have selected two at a time but we have done the same operations with them as one.  From here on we expand on that and also start manipulating edges to get the effects we want.

  • So to start we need to select the top nine polygons all at once.
18-Nose Before

The top polygons selected, not the bottom three.

  • Now similar to before we extrude out the front to about the same length as the polygons before it and then scale the nose in both on the Z and Y axis.
19-Nose After

End result with the nose cone

  • now we finally have something starting to look like a proper plane, but every plane needs a cockpit.
  • So start by selecting the centre most polygon behind the nose cone.
  • Like before, extrude up, scale it down and move it back so the rear edge of the polygon is just past the front of the wings.
20-Cockpit

The start of moulding the cockpit.

  • Now as it stands, it doesn’t look much like a cockpit, more like something poking out the aircraft, so here’s where we begin to mess with edges.
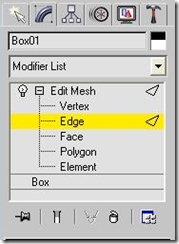
  • First begin by changing your selection mode from Polygon to Edge
  • With the object selected, click on the second tab in the command bar window.
  • Expand the “Edit Mesh” tree (if not so already)
  • Select the “Edge” branch of the tree and you are in edge selection mode
image

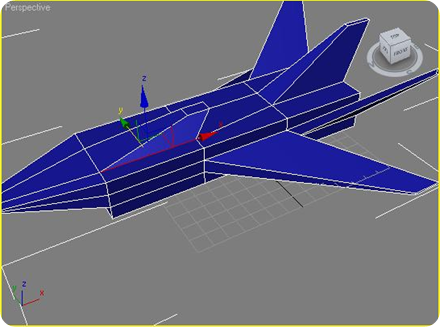
  • Now select the edge of the cockpit as shown below
  • Right click and change to Move mode
  • Then using only the Y arrow move the edge of the cockpit closer to the side of the plane.
image

1st Side of cockpit done

  • Then rinse and repeat for the other side of the cockpit

image

2nd Side of cockpit, try and get the two sides even

Unlike before, you cannot select the two edges and move them as one to get the effect, try it and see what happens.


Onto the Engines

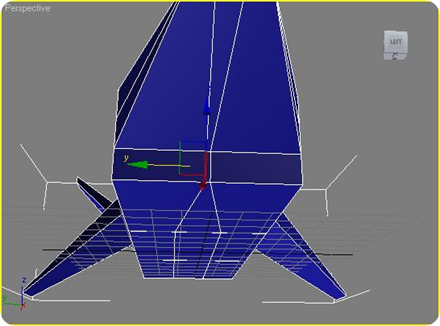
Now with the main body mostly done, it’s time to give our baby some juice and my that I mean some nice big engines.

  • First off, with any jet engine to push something out it needs to suck something in.  Not a great phrase but basically lets start with the engine intakes.  Since we are already at the front it make sense.
  • Angle the view down and up slightly so you get a view under the cockpit
  • Remember those 3 polygons we left alone earlier, they are going to become the intakes.
  • As we are still in edge selection mode, select the two middle edges one at a time and move them towards the centre as below.  This gives us two nice polygons for our intakes.
image

Start of intakes with edges moved inwards

  • Now switch back to polygon selection mode and select the two large polygons on the front.
  • Next we are going to use another command on the right click menu, “Bevel”.  Right click on the selected polygons and select “Bevel Polygons” in the menu.
image

“Bevel polygon” command highlighted on left side of menu

  • the Bevel command works the same as the Extrude command with one difference, it is a two step command.  So like when you created the box to begin with (drawing the shape first and then giving it depth), the bevel command performs two actions.  It is actually a combination of Extrude and Scale.
  • So now if you hover over the polygons you will see a new icon (not a gizmo), click and hold the mouse and drag it downwards.  You will see that you are now burrowing inside the plane.
  • Let go of the mouse when you think you are deep enough, but note that you are not jet finished, pull down on the mouse and notice that the hole you have just made is now narrowing.  Play with it until you are happy with the result.
image

End result.  Notice I have actually bevelled twice, second time a bit deeper to give a narrowing effect.


Lastly – The Engine

To finish off our plane we need an engine, one powerful enough to blast us in to outer space, or at least get us off the ground.

Nothing new here but a culmination of what you have used so far.

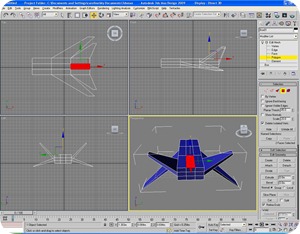
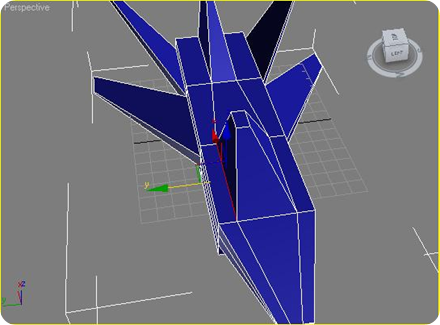
  • First rotate the perspective view around to look at the rear of the aircraft.
  • Fist off, we need a big engine and with the way the polygons are arranged at the moment, it’s just not big enough, so lets move the edges around to give us a bigger expanse to work with.
  • Use the command panel and get back into edge selection mode first.
image
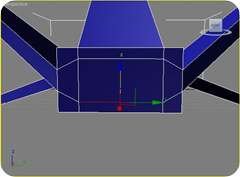
  • First move out the centre edges to the sides like so (moving the entire vertical line)
  • Next move the inner horizontal lines to create one big polygon in the centre.

Only move the inner edges this time else it will mess up the rear wings.

image

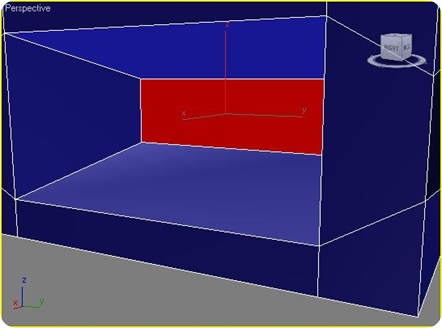
  • Now all that’s left is to carve inwards the Engine exhaust in the same way we did with the intakes using the Bevel command.
  • First change back to Polygon selection mode and select the centre polygon.
  • Then right click and select the “Bevel Polygon” command, left click on the selection and pull back, remembering when you let go of the mouse, you will perform the second part of the command to scale in and pull back again.
image

Engine exhaust bevelled inwards

  • Now to finish off the engine I added a little twist and reversed the last step and then bevelled outwards, to show a little of what can be done by mixing commands, so with the polygon still selected and the “Bevel” command still in action.
  • left click on the selected polygon and then push up (instead of down like before), let go of the mouse button and then pull back, to get something like below.
image

Engine final result


Conclusion

That’s if for now.  I’d suggest not stopping there and play around with this tutorial a bit to get a feel for the basics, even try starting with a cylinder primitive instead of a box to see what difference it makes to the outcome.

Remember, we have done all the above with only 1 primitive, we could have fashioned the wings, cockpit and such with multiple objects, but there is really no need when you can mould from something simple.

For extra credit though also try adding some weapons and missiles to the aircraft with other objects (starting with a cylinder first or a Cone) and moulding it to your needs.

Have fun and get ready for the next instalment in the series after I get the other half of this tutorial done in Blender.  Blender requires a little more work to get to this point but the important thing to remember is that the tricks are he same, just a different way of doing them.

Enjoy!

Friday, 15 May 2009

3D Modelling Tutorial Part 2 – Intro Basics

Given the time constraints I've had trying to get this tutorial moving, I’ve decided to shake things up a bit to get the posting a bit more regular.

So I've dropped the 3D man part of this tutorial to focus on the slightly more complex Plane model.  The trick with this is to master the 3 main commands (the bread and butter of 3D modelling), namely Move, Scale and Rotate.  by the end of this tutorial you should be used to flipping between them and how best to use them to get results.

This is what were aiming for:

Tut2-Plane Finished

End result of 3D plane

Now this isn’t intended to be pretty, later on we will come back to this model for texturing and animation (amongst other things)

So let us begin.

First with some basic controls for Max (will do the same for Blender), practice with these until you’re happy getting around.

Selecting a viewport

Now for the first basic step, you got the application loaded, you’re running around with your mouse and wondering where to click next.  Remember the descriptions about the view ports in Tutorial 1 (I know it’s been a while so you might need to do a quick refresh).

Well mouse command with 3D software works a little differently, first it’s the right mouse button that is king, it is used for selecting viewports and more importantly cancelling commands while you are performing them.

Left mouse button is used for drawing and selecting commands.  You can also combine this with the CTRL (Control) key to select multiple items.

Middle mouse button is used moving the view around left / right and up / down.  You can also combine this with the ALT key to rotate view around.

Crack the Mould

You got to start somewhere right?, so we begin with a basic primitive, a box, which in 3DS max we can shape it the way we want it straight away.

  • So first right click in the “Top” viewport and then go to the command bar in the right hand panel and select “box”
1-Add Box image
  • Then draw a rectangle in the “Top” viewport by clicking and dragging from top left to bottom right using the left button of the mouse. 
Feel free to play with the rest of the standard primitives in the command panel if you wish.

Now, when you let go of the mouse, you have to remember you haven’t finished drawing, a box like most primitives in max, allows you to draw many dimensions when creating objects.

  • Now drag your mouse upwards, you should notice your shape now gains height (as above) in the other windows.  Click the left button mouse when your happy with the height to finish.
  • Next we want to carve up the box ready for us to build our plane.
2-Break up box image

Here we set the initial properties for the box we have just created such as the height, width, length, how many segments in each dimension.  You also have the open when creating a box to restrict it to a simple cube, meaning that all dimensions will remain equal when drawing the box.

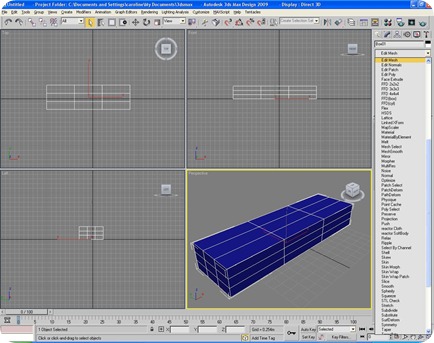
  • Copy the settings from the screen above for your box, the L / W / H don’t have to be exact (just get close enough) but set each of the segments to 3.  this breaks the box up in to 27 individual cubes and gives us a start point to begin pulling it apart.
*Tip – Hitting F4 will toggle between showing the geometry of objects in the viewports.  To display a solid or shaded wireframe view.


Practice getting the hang of views

Before we jump a little further you should familiarise yourself with moving around the views now that you have something to look at.

following on from the section earlier, select a view (say perspective) with a right mouse click and hold down the middle button of your mouse, note that now when you move the mouse, the view moves on the X and Y axis (up, down, left and right).

Now hold down the ALT key and repeat the process, you should now notice that the view rotates around the model now.

Also if you use the scroll wheel, the view zooms in and out.

These movements work in all of the viewports, play around and get used to them as you will be using them a lot.

Importance of model types

Now for us to continue, we need to convert the box we have created in to something we can mould.  When you create objects from the command bar, they each have a set of parameters (like the box above) with which you can tweak to change their basic shape:

  • Boxes have Height, width and length (plus segments)
  • Spheres have a radius and segments
  • etc.

Now this is fine when you are just creating basic objects but to start to work on them in a more creative way, you need to convert them in to an editable object, either a mesh or a polygon.

Now I wont go in to the intricacies of the difference between an “Editable Mesh” and an “Editable Polygon”, as there is not much between then but they each have their own unique properties and way you work with the converted object (there are a few other types as well).  I shall leave you to play with each type in your own time.

Key thing to remember when converting an object in to an editable object option is that it’s previous parameters are lost when using the right click option, you no longer retain to tweak the object from it’s original form.  So check that you are happy with it before you convert it.  Using the second method does not.

3-Convert

Converting object using right mouse click on object, selecting “Convert To” menu)

4-Convert Alternate
Converting Object using “Modifiers” by selecting object, clicking the second tab in the right hand command panel and selecting the correct “edit” type from the list (more on modifiers in a later tutorial)

Selection modes on an object

Next hurdle to get across is to show the different ways you can select the object.  if you have been playing so far you will see that when you click on your object that you are selecting the entire object in one.  Now, to get modelling we need to work on a much lower level.

Most 3D tools once you start pulling the objects apart give you the following selection options:

  • Vertex – lets you move the individual points of the object
  • Edge – moves the selected edges :-) (2 vertexes and 1 line per edge)
  • Face – moves a face of a polygon (4 vertexes and 4 lines per face)
  • Polygon – moves an entire polygon (8 vertexes and 12 lines)
  • Element – lets you edit the properties of each part of the object

In 3DS max this is represented in the right hand command panel from the second tab, as shown below

image

Second tab selected with the parts of the edit tree expanded.  By default it is displayed collapsed with a cross to the left of the “Edit Mesh” or “Edit Poly” modifier in the list


How to use the GIZMO

the Gizmo is an important tool no matter what 3D application you use, they all work pretty much the same way.

So here’s the Gizmo in it’s three variants in Max, each looks a little different and operates differently to support the kind of action/command you’re performing

image

The Move Gizmo.

  • Appears when you activate the Move command.
  • 3 Arrows in each of the 3 directions (X,Y,Z)
  • Holding the Arrow moves only in that one direction.
  • Holding the boxes in between the arrows allows movement in 2 or 3 directions.
image

The Rotate Gizmo

  • Appears when you activate the Rotate command.
  • 3 Rings, one for each rotation direction.
  • Holding a single ring rotates only in that direction.
image

The Scale Gizmo

  • Appears when you activate the Scale command.
  • Like the Move gizmo has three direction arms, which scale in one axis
  • Like the Move Gizmo has inner sections to allow scaling in more than one direction.


Lastly, a note on Pivot Points

A key thing to remember about the Gizmo is that it operates from a single point, known as the Pivot point.  By default this point is the bottom centre of the object or the middle of an individual element (such as an edge or polygon).

you can change this which we will go into in a later tutorial, but something to be aware of.  So if something doesn’t rotate or Scale how you like, then it will be because of the Pivot point

In Conclusion

This action packed intro to tutorial is essential as you go through the main section (coming very soon).  SO practice the above and play at moving around the viewports, using the basic commands and looking at the make up of objects.

Thursday, 30 April 2009

While you were sleeping

Well, I've not been sleeping on the job, quiet the oppisite really. I'm yet again rushed off my feet and yet again in India (although flying home in a few short hours).
Why is it that managers only realise that a project wont actually work a few short months/weeks before delivery and then think that just throwing resources at it will solve all the problems, pah. SO here I am again along with several of my colleagues, patching holes and getting it fit for release.
A story all to familiar for my game development ;-)

Anyway, that's not why i'm, posting, I could moan all I want about work, but at the end of the day, I started this blog to force me to improve my skills and share what i've learnt.

To that end, i'm also not above pointing out the work of others. So while I work on my next post. So here are two blogs/posts of interest.

A low poly tutorial for creating a aeroplane propeller using 3DS Max

A series of Blender tutorials including Captain Blender and some character rigging by Maarten

Something to be getting on with while I finish up part 2. It's almost ready, i've completed the 3DS side of the tutorial and need to finish up the Blender repeat.
Enjoy

Wednesday, 18 February 2009

Into the Fray – 3D modelling tutorial part 1

Intro

Welcome to my little corner of the web and the start of the 3d Modelling tutorial.

First off I'll mention what that this tutorial is not, it's not a tutorial for learning any specific 3D modelling tool, this tutorial is for teaching specific modelling techniques, one of the trickiest things to get done right.

If your looking for a tutorial on how to use all of Blender's neat trick and tools then pop a visit over to Gryllus.net where there is a great wealth of written and video tutorials to teach you all the in's and out's.  Also try Tufts Open Courseware, which have a lot of how to videos.

For 3DS Max, the best resources can be found over at Lynda.com or try 3D Links which has a few 3DS Max tutorials and they also have tutorials for quiet a few other products as well, bit harder to find great tutorials for 3DS max that are cost effective (meaning free :-) )

That aside, lets get back to what this tutorial is intended to achieve. What were going for here is a tutorial telling you how to build your models effectively and setting the foundations for getting things done.

3D modelling is really no different to clay modelling in principle, you start with a lump of clay, shape and mould it into what you want, thinning here, carving there and adding more modelled clay as appropriate. In 3D modelling you will start with some primitive (cube, sphere, cylinder or plane) and twist, bend, delete and adding other primitives to work towards your end result.

So onto what is usually the hardest part, staying awake though all the theory and introductions

For this tutorial we still will be covering some modelling tools functionality, initially just using 3DS Max and Blender, to also give a bit of a comparison between the tools and what you get for your cash. But the aim is as stated before to teach you how to model, not specifically to teach you the tools.

Interfaces and Panels

First off, the screens themselves, like most applications they are broken up into several panels, each applications panels work differently and have different abilities.

Both 3DS max have the common top panel (menu bar) used for menus and command buttons, however Blenders top panel also expands to expose a load of Blenders system settings.

Then there is the modelling / command panel, from here you will be using the various commands and action's you'll be using to craft and shape your creations.

Finally their is the main window /  viewport, this is where your models will come to life, slowly at first until it's shaped and carved into a thing of beauty, or at the very least something like you were imagining.

Main Screen Small

3DS Max main window with the viewport in the centre, menu to top and command bars to right and left

 
Main Screen Small

Blender default setup with one main viewport, menu bar to top and command bar at the bottom

Viewports

The Main panel described earlier, contains what is referred to as a viewport. Now for modelling you normally want to be working with 4 Viewports, each of them displaying a different perspective of your model / scene, these are called the Front, Left, Top and perspective viewports.  These viewports allow you to view a specific profile of your model (like taking a picture) without having to keep rotating around to see how it looks.

Where this becomes especially important, is when your adding new objects to your scene, a cylinder for instance when added to the front viewport is oriented completely different when added to the top or left viewports .

Again comes one of the many differences between Blender and 3DS Max, in 3DS Max, you have 4 viewports from the start, one for each perspective (Front, Top, Left and Orthographic) and the viewports are dynamic and can easily switch between the 4 viewport view and a single expanded viewport (making it full screen). Blender however starts with only 1 viewport, you can change the viewports view with a single key press, but unlike max you don't get the full view of your model / scene. However, you can make Blender have all four vies at once by splitting the main viewport in to smaller views but you cannot switch between the 4 viewport view and a single full screen view, at least not easily. SO with Blender you have to make a choice how you want to work, one single large viewport and keep switching the perspective, or change it to 4 views and work with a smaller screen space.

*Note, The next version of Blender is apparently adding the same viewport functionality as Max, if so it will make it so much better.

You can get used to it, for example I started with blender some years ago and felt the single view was enough, that was until I started using Max and fount the 4 view so much more valuable and flexible.
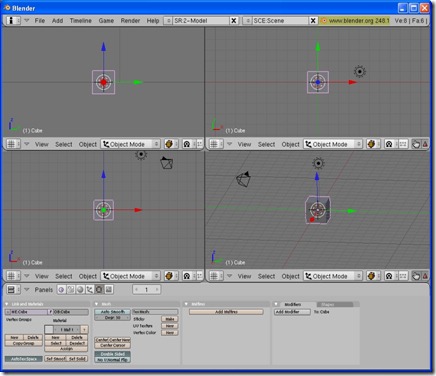
4 View Small

Blender configured to have 4 views similar to 3DS Max, main difference being that Max can switch between single view and 4 views with 1 key press.  Blender cannot, you would have to revert to the default view to do it.

The makeup of a model

Right, this section should start to become a bit more familiar to those of you who are using models in your games, if not I'll still be stepping through this carefully. It is very important to understand how the model is actually made up as it affects how you manipulate the model into the shape you want.

  • Vertices

Vertices are the individual points in a 3D space that make up your model, these are usually represented as a vertex (x, y, z), a 3d world coordinate.

  • Edges

Edges are the lines that connect two vertices

  • Faces

A face is what is created when 3 or more edges are connected together, the simplest face being a single triangle

  • Polygon

A polygon is what is created when 4 or more faces are connected together, the simplest polygon being a pyramid

  • Normals

Normals are the direction in which light is reflected from a surface, they are stored as part of the Vertex and calculated for each face.  if your model looks black (no light reflection) this is usually because the normal is pointing the wrong way.

3D modelling tools use these to craft your designs into your eventual masterpiece

Under the 3D hood

Items of pre-Created 3D geometry are called Objects, Objects consist of Cubes, Pyramids, Torus's and so on. These objects are the basis of what is referred to as Box Modelling.

Each 3D modelling tool comes with it’s own factory default 3D objects and if you so with you can create your own and keep them as templates if you find yourself using a custom object as a template.

there is not much more to say on these really, 3DS max comes with about xx basic and advanced 3D object templates.  Blender has a more basic complement consisting of only the basic (XX,XX) types.

the main trick of the experienced artist is to build up your own library, knowing which one to use when and modifying to each of your models needs.  For example if you are constantly adding a particular shape (say an arm if your making human models), you can create a basic arm shape and just reuse and modify it ass necessary for all your human shaped models, making the building of a ton of human characters in to a simple task of taking sample arms, heads, torso’s and legs and then changing them as you want, in the same way that shop mannequins are put together.

The World of 2D

Strangely enough, even in the world of 3D, there is a place for 2D. Now 3DS Max has an expansive list of 2D material, which it refers to as "Splines". Blender on the other hand only has one which is called a "Plane".

2D Splines are important for creating custom geometry that would otherwise take much longer with other methods.

So you can draw out a 2D shape and then convert that into a 3D object, which saves time.  Starting the same object in 3D requires a lot more time.

So for instance I could create a Cylinder by creating a Cylinder object or by drawing a Circle and Giving it depth.  But also consider what it would take to make a 3D arrow, using only 3D objects I would have to create a box and then a flat pyramid, join them together and then tidy up.  in 2D I would just draw a flat arrow shape and then give it depth.  This becomes more crucial if you want to ad cure to that arrow for instance.

The Gizmo – Add 3DS max

A gizmo is a bit of a funny term but it is what is used to describe a very critical device used in modelling.  What it basically does is to provide an anchor pivot point that can constrict movement to a particular set of axis.

In English this means it enables the artist to only move the selected item in one or two directions according to the selected action (see next section).  Normally the Gizmo sits in the middle of the object and the bottom by default, but this can be altered so you can manipulate the model effectively.

It also forms the pivot point for any rotating manoeuvres, so rotate on this point.

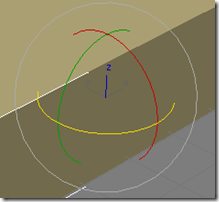
The gizmo is also colour coded to make it easier to tell the difference between the 3 axis.  Red for the X axis, Green for the Y axis and Blue for the Z axis.

Max Gizmo  

Gizmo

3DS MAX Gizmo


Blender Gizmo

So if you just wanted to move a model along the X axis only, you just grab the line marked “X”, to move it along the X & Y axis, then grab the line between the X & Y axis.  In later tutorials why you would want to do this becomes more clear.

Now back to differences again, in 3DS max the gizmo is always active when you have selected something, whether it is a Vertex, face or what ever.  In Blender however the gizmo is only visible in Object mode (moving entire polygon), in edit mode the gizmo is still there but to use it you use keys instead of the mouse.

Finally the fun stuff

To wrap this first episode, we'll end with actually doing something.

There a 3 main actions performed when modelling, these are:

  • Moving - seems obvious, moving any vertices, edges, faces or polygons
image

Box moved from left to right

  • Scaling - the act of increasing the size of an object or in the case of faces and edged, moving the vertices closer together. Obviously a single vertex cannot be scaled.
image

Box scaled up, increasing in size

  • Rotating - turning a polygon around it's pivot point, or in the case of faces and edges, around the centre most point of the vertices.

image

Box rotated right using the centre of the box as a pivot

These are then combined with 3 of the main modelling commands

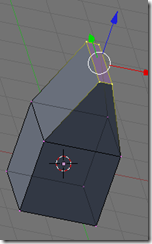
  • Extruding - can be applied to a single vertices, edge or face, this moves the vertices of the selection and extends the surrounding edges. Can move away from or into the polygon

Extrude Before

Extrude After

Before Extrude

After Extruding up on the Z Axis

  • Bevel - similar to extruding but angles or smooth's the edges once finished but can only be done to faces, like extrude can bevel out or into the polygon.
03-Bevel After    Bevel

A cube bevelled in using 3DS Max


A Cube bevelled out using Blender

  • Chamfer - Similar to Bevel except it bevels the corners instead of the edges.
04-Chamfer  

Chamfer

A cube with one chamfered edge using 3DS Max  

A cube with a chamfered top using Blender (unfortunately not easy to show)

Conclusion

SO there are the basics, in the next Chapter, I’ll show 2 quick examples using all these techniques and commands so far.

Nice and slow at first.

Please leave any comments and queries about what we’ve covered so far (just the basics and theory) and if there are any specific techniques that you want covering later.

Please let me know if you prefer videos or walkthoughs, or heaven forbid, both :-)